Contents
- 1 Introduction to Low Voltage LED Outdoor Lighting
- 2 Advantages of Low Voltage Outdoor Lighting
- 3 Planning Your Outdoor Lighting Layout
- 4 Selecting the Right Low Voltage Lighting Equipment
- 5 The Role of Transformers in Low Voltage Lighting
- 6 Choosing the Appropriate Lighting Fixtures and Bulbs
- 7 Wiring and Electrical Connections for Outdoor Lighting
- 8 Installation Steps for Low Voltage LED Lighting
- 9 Maintenance and Safety Tips for Outdoor Lighting
- 10 Final Touches: Testing and Adjusting Your Outdoor Lights
Introduction to Low Voltage LED Outdoor Lighting
How to install low voltage led outdoor lighting? When we talk about low voltage LED outdoor lighting, it’s a game changer. This type of lighting uses less energy than traditional bulbs, making it a more efficient choice. Think of it as a safer alternative for your gardens and walkways, as it’s designed to operate on just 12 to 24 volts. Unlike standard 120-volt systems, low voltage lighting is less risky to install and handle. It’s perfect for DIY enthusiasts.
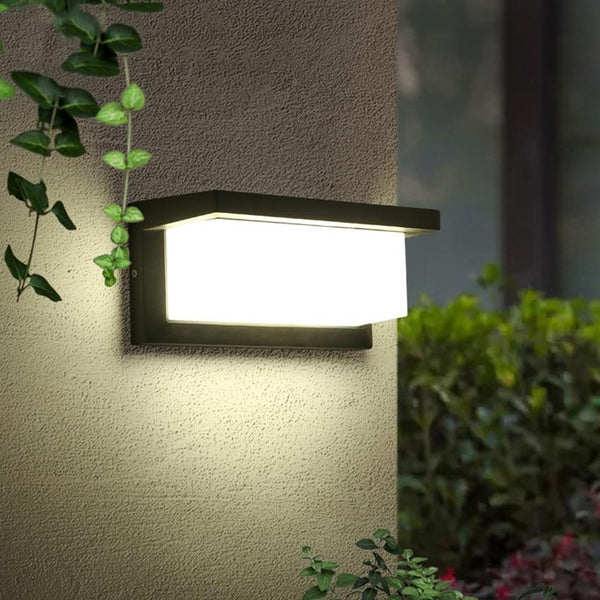
With low voltage LED lighting, the chances of electrical accidents are much lower. You can handle the installation yourself without worrying too much about shock hazards. This kind of lighting is also flexible. You can use it to highlight your garden’s best features or light up a patio for evening comfort. Another perk? It’s kind to your wallet in the long run because of its energy efficiency.
Not to forget, LED lights have longer lifespans compared to traditional bulbs. This means fewer replacements and less maintenance for you. They are available in various styles and designs, so finding one that suits your personal taste is a breeze. With low voltage LED outdoor lighting, you can create a warm and inviting atmosphere that enhances your home’s safety, beauty, and overall value.
Advantages of Low Voltage Outdoor Lighting
Low voltage LED outdoor lighting offers several benefits for homeowners looking to enhance their outdoor spaces. Here are the key advantages:
- Safety: Operating at 12 to 24 volts, low voltage lighting is much safer to work with than standard systems. It reduces the risk of electric shock, making it ideal for DIY installations.
- Energy Efficiency: These lights consume less power, leading to lower energy bills. Their efficiency makes them a smart choice for environmentally conscious consumers.
- Longevity: LED lights last longer than conventional bulbs. This means you won’t need to replace them as often, saving time and money on maintenance.
- Versatile Design: With a variety of styles available, low voltage lighting can match any outdoor decor. They are perfect for accentuating garden features or providing ambient patio lighting.
- Increased Property Value: A well-lit exterior can boost your home’s curb appeal. It adds a high-end look that could increase your property’s market value.
- Flexibility: Low voltage lights are easy to move and adjust. This lets you change your outdoor lighting layout as your garden grows or your preferences change.
- Ease of Installation: These systems don’t require extensive wiring or deep trenches. This makes the installation process quick and straightforward.
- Weather-Resistant: Made for the outdoors, low voltage lights can withstand different weather conditions. This durability ensures they perform well throughout the year.
Incorporating low voltage LED outdoor lighting into your landscape not only adds beauty but also provides practical, cost-effective solutions for illumination after dark.
Planning Your Outdoor Lighting Layout
Sketch a Design
Before you dig in, a clear plan is vital. Start with a sketch of your garden. Mark where you want lights. This helps decide how many lights you’ll need.
Count the Fixtures
Based on your design, count how many low voltage LED fixtures you require. Don’t forget pathways, special plants, and architectural details.
Consider Outlet Locations
Identify outdoor electrical outlets. Place them in your sketch. This aids in planning the transformer placements and cable runs.
Zone Your Areas
Divide your garden into zones. Each zone may need a different light type or intensity. Some areas may need spotlights, others softer lighting.
Plot Cable Paths
Figure out where cables will go. Avoid high-traffic areas. Measure distances for accurate cable lengths.
Plan for Expansion
Leave room for changes. You may want to add lights later. Ensure your transformer can handle extra load.
Remember, planning is key. A good layout means easier installation and better results. Keep it safe and simple. Your outdoor space will shine with your well-thought-out design.

Selecting the Right Low Voltage Lighting Equipment
Selecting the right equipment is crucial for effective low voltage LED outdoor lighting. Here’s how you can choose the best options for your garden.
Choose the Right Transformer
The transformer is a key component. It converts standard voltage to low voltage. Ensure it can handle the total wattage of your lights plus 25% more for safety.
Pick the Best Lights
Decide between spotlights or path lights depending on your needs. Spotlights highlight features while path lights provide general illumination.
Select Durable and Efficient Bulbs
LED bulbs are ideal. They use less power and last longer. Choose bulbs with a warm color temperature for a cozy glow.
Get Quality Cables and Connectors
Opt for cables thick enough to reduce voltage drop over long distances. Use reliable connectors that prevent wiring issues.
By choosing the right equipment, you ensure your outdoor lighting is both beautiful and functional.
The Role of Transformers in Low Voltage Lighting
Transformers play a critical role in low voltage lighting systems. They convert the standard 120-volt household current down to a safer, lower voltage, typically within the 12 to 24-volt range. This key function ensures that the entire lighting system operates efficiently and safely, guarding against the risk of electrical hazards when installing or interacting with the system.
Choosing the Right Transformer
Selecting the appropriate transformer is essential for the efficiency and safety of your low voltage landscape lighting. Here’s what to consider:
- Total Wattage: Add up the wattage of all the lights you plan to connect. Your transformer should handle this total wattage plus an additional 25% to accommodate any power surges or expansions in your lighting design.
- Build Quality: Opt for a transformer that is robust and weather-resistant. Outdoor elements can be harsh, and the durability will ensure longevity.
- Additional Features: Modern transformers come with useful features such as timers and photocells. These automatically adjust lighting based on the time of day or ambient light conditions, adding convenience and energy efficiency.
By understanding the role of transformers and carefully selecting the right one, you can enhance the performance and reliability of your outdoor lighting setup. Use this knowledge to ensure your system is both effective and safe.
Choosing the Appropriate Lighting Fixtures and Bulbs
Selecting the ideal lighting fixtures and bulbs is crucial for your low voltage LED outdoor lighting project. The choices you make will affect both the aesthetics and functionality of your garden or outdoor space. Here’s what to consider:
Selecting the Right Lighting Style
Firstly, match the lighting style to your garden’s theme. For a modern look, select sleek and streamlined designs. For classic gardens, choose fixtures with traditional details. Each fixture should complement the space it illuminates.
Understanding the Function of Each Light
Think about the purpose of your lights. Do you need to highlight a path, a special plant, or an architectural detail? Spotlights are great for focus, while path lights offer a soft overall glow. Ensure each light serves its intended function.
Choosing Bulbs for Efficiency and Ambiance
LED bulbs are the top choice for efficiency. They consume less energy and last longer than other types. Pick a warm color temperature for a welcoming ambiance. This color is often described as ‘warm white.’
Durability and Weather Resistance
Outdoor lighting must withstand the elements. Look for fixtures and bulbs rated for outdoor use. They should be water-resistant and durable enough to handle various weather conditions.
Size and Proportion Matters
Keep scale in mind. Fixtures should fit well in your space, neither too big nor too small. Larger areas may need bigger lights while smaller spaces do better with subtle fixtures.
By carefully considering these aspects, you will ensure a successful installation of low voltage LED outdoor lighting that enhances your home’s exterior and improves nighttime visibility.
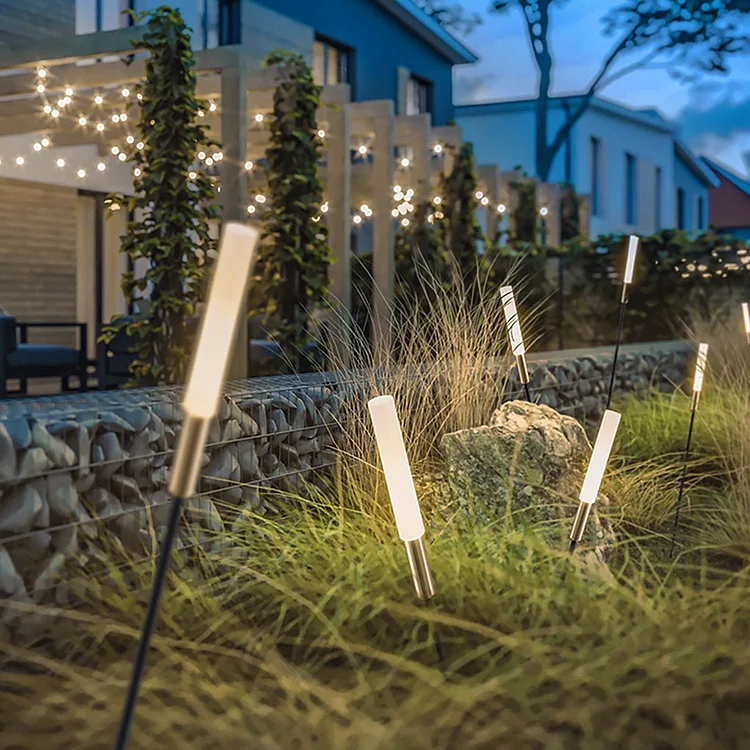
Wiring and Electrical Connections for Outdoor Lighting
When setting up low voltage LED outdoor lighting, proper wiring and electrical connections are key. This step ensures your lights work well and are safe. Here are some tips to guide you through the process.
###Choose Safe Low Voltage Wire
Pick the right gauge low voltage wire, like 14/2 or 12/2. The lower the gauge, the thicker the wire. Thicker wires reduce voltage drop over distances. They support more lights along the cable without losing power.
Use Reliable Connectors
Choose connectors that will last. Good connectors keep wires tight and prevent moisture or dirt from causing trouble. They make adding or changing lights easier.
Plan Wire Layout Carefully
Lay out your wire before you dig. Avoid areas where people walk often. Bury wires where you won’t trip over them.
Check for Polarity
Some systems need you to match wire ends correctly. Check your lights for positive and negative sides. Attach wires to the right terminals.
Secure Your Wiring
Once laid out, secure your wiring. Use garden staples or bury it slightly to prevent it from moving.
Ensure every connection is firm and all wires are neatly placed. This makes your outdoor space both beautiful and hazard-free. With attention to these details, you’ll enjoy your outdoor lighting without any worries.
Installation Steps for Low Voltage LED Lighting
Installing low voltage LED outdoor lighting involves several key steps.
Decide on the Layout
First, decide where you want your lights. Sketch a layout considering light positions and cable paths. Mapping things out helps save time and effort later.
Install the Transformer
Next, install your transformer close to an outdoor power outlet. Ensure it can handle the total wattage of your lights plus some extra to avoid overloading.
Lay Out the Wiring
Lay out the low-voltage wire according to your plan. Avoid high-traffic areas to prevent damage to the wire.
Connect the Lights
Connect your LED lights using reliable connectors. Ensure that they are tightly fitted to prevent issues.
Test Before Burying Wires
Before burying the wires, test your lights. Make sure every light illuminates and works as expected.
Bury the Wires
Once tested, bury the wires neatly. Cover them with mulch or earth. Ensure they are slightly buried to prevent exposure.
Set Up Light Fixtures
Position and ground your light fixtures according to your layout. Adjust them to direct light where needed.
Final Testing
Turn on the transformer and check all lights at night. Adjust positioning if necessary to achieve the desired effect.
By following these steps, you can install low voltage LED lighting that enhances your home’s aesthetics and safety.
Maintenance and Safety Tips for Outdoor Lighting
Maintaining your low voltage LED outdoor lighting is key to its longevity. Here are some tips to ensure they stay safe and functional:
Inspect Regularly
Check your lights often. Look for exposed wires or damage. Fix any issues quickly to prevent hazards.
Clean Light Fixtures
Dirt can dim your lights. Wipe fixtures gently with a soft cloth. Clean bulbs without harsh chemicals.
Trim Plants Around Lights
Keep foliage trimmed. This prevents lights from getting covered. It ensures they illuminate as planned.
Check for Water Damage
Outdoor lighting is weather-resistant but not invincible. After heavy rains, check for water in fixtures. Dry them out if needed.
Test the Transformer
Test your transformer periodically. Make sure it’s not overheating. Replace it if it’s faulty to prevent failures.
Tighten Loose Connections
Connections can loosen over time. Tighten connectors and ensure wires are secure. This prevents power loss and flickering.
Review and Readjust
As seasons change, so can your lighting needs. Reevaluate your light placement. Readjust for the best effect.
By following these simple maintenance and safety steps, your low voltage LED outdoor lighting will continue to enhance your home’s appeal and ensure a well-lit outdoor space.
Final Touches: Testing and Adjusting Your Outdoor Lights
After installing your low voltage LED outdoor lighting, the final touches are crucial to ensuring everything runs smoothly. Here’s what to do:
Test Your Lights
Once installation is complete, test each light. Turn on the transformer and check if all lights are working. Address any issues immediately.
Adjust the Light Placement
Review the placement of the lights at night. Sometimes, shifting a light slightly can enhance the effect. Adjust angles and positions as needed for optimal illumination.
Analyze Light Coverage
Look for dark spots or overly bright areas. Adjust the lights or add more fixtures to balance the light distribution. Even coverage is key for a harmonized look.
Check Color Temperature
Ensure all lights have similar color temperatures. Variations can disrupt the ambiance. Replace any bulbs that don’t match to maintain consistency.
Final Walkthrough
Walk around your garden or outdoor area. Make sure you’re satisfied with how each section looks. This is your last chance to tweak settings before enjoying your new lighting system.
By taking these steps, you finalize your low voltage LED outdoor lighting efficiently. Your outdoor space should now be well-lit, enhancing evening aesthetics and safety.
