Contents
Introduction: Benefits of LED Recessed Lighting
Installing LED recessed lighting in your existing ceiling can transform a space dramatically. This type of lighting provides a clean, modern look while also being energy-efficient. LED lights consume less power and have a longer lifespan compared to traditional bulbs. They also produce less heat, making them safer to use in various settings. This article will guide you through the steps to install LED recessed lighting in your ceiling, covering everything from preparation to finishing touches.
Materials and Tools Needed
Gathering Supplies
Before you begin the installation process, it’s crucial to gather all necessary materials and tools. You will need LED recessed light fixtures, LED bulbs, a dimmer switch (if desired), and electrical wiring. Additionally, having a junction box for electrical connections is important.
Don’t forget essential tools like a drill, drywall saw, wire stripper, measuring tape, and a level. A stud finder will help locate beams or joists in your ceiling. Having the right materials on hand makes the installation process smoother and more efficient.
Safety Equipment
Safety should always be a priority during any home project. Gather safety equipment such as safety goggles, gloves, and a sturdy ladder. Turn off the power at the circuit breaker to ensure that you work safely. Double-check that the power is off using a voltage tester before you start.
Following safety precautions not only protects you from injuries but also ensures a successful installation. A well-prepared workspace will allow you to focus on the task without distractions.
Planning the Layout
Determining Fixture Placement
Careful planning is essential before installing recessed lights. Decide where you want to place the fixtures for optimal light coverage. A common guideline is to space the lights about 4 to 6 feet apart, depending on the size of the room.
Consider factors like the purpose of the space and any furniture layouts when making your decision. Using painter’s tape, mark the intended locations on the ceiling, giving you a visual reference.
Measuring and Marking
Once you have a plan, measure the distances accurately. Use a measuring tape to ensure that the lights are evenly spaced and aligned. It’s also essential to consider any existing structures, like beams or ducts, that may obstruct the installation.
After measuring, draw circles where the fixtures will go. This reference allows for more accurate cutting during the installation process. Taking time to plan effectively can prevent mistakes later on.
Cutting the Holes
Preparing to Cut
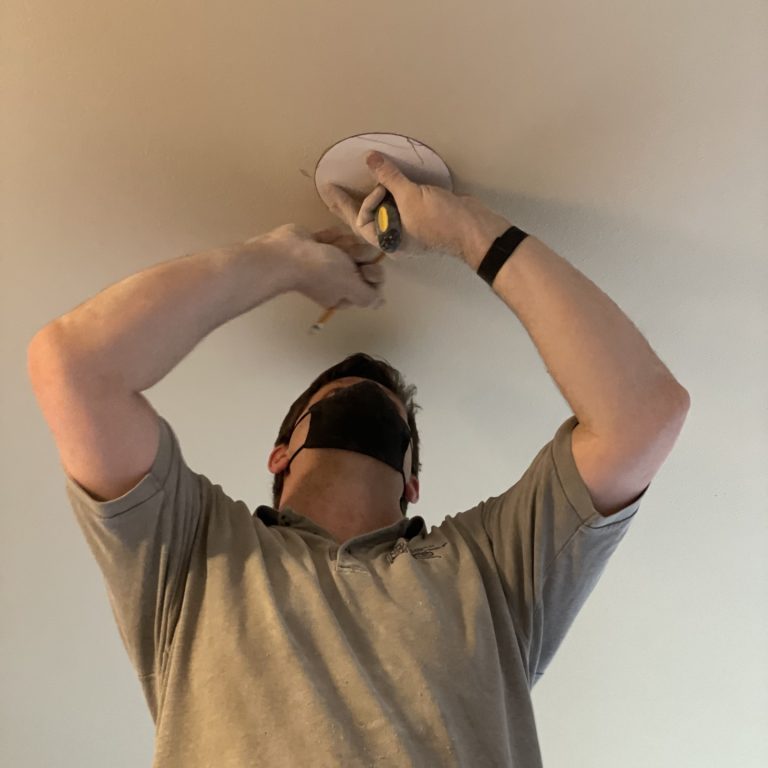
With your circles marked, it’s time to cut holes in the ceiling. Start by using a drywall saw or a hole saw attachment for your drill. A hole saw provides clean edges and only requires minimal force to cut through the material.
Before cutting, double-check your measurements to ensure you are cutting in the right spots. Always wear safety goggles during this process to protect your eyes from dust and debris.
Cutting the Holes
Begin cutting at one of the marked circles, applying gentle pressure. Keep the saw steady to avoid damaging other areas of the ceiling. Once you complete a hole, move on to the next one while maintaining an eye on your measurements.
After cutting all holes, inspect them to ensure they are smooth and even. Any rough edges can be touched up later. Take your time with this step, as accurate holes are vital for proper fixture installation.
Wiring the Fixtures
Running Electrical Wire
After cutting the holes, it’s time to wire the fixtures. Start by running electrical wiring from the existing light source or the junction box to each hole. Ensure that the wire is appropriate for your lighting setup, usually 14/2 or 12/2 gauge wire, depending on your circuit.
Make sure the wiring is secured and does not hang loosely. Fastening the wire to beams or joists will help keep everything organized. This careful approach prevents potential hazards in the future.
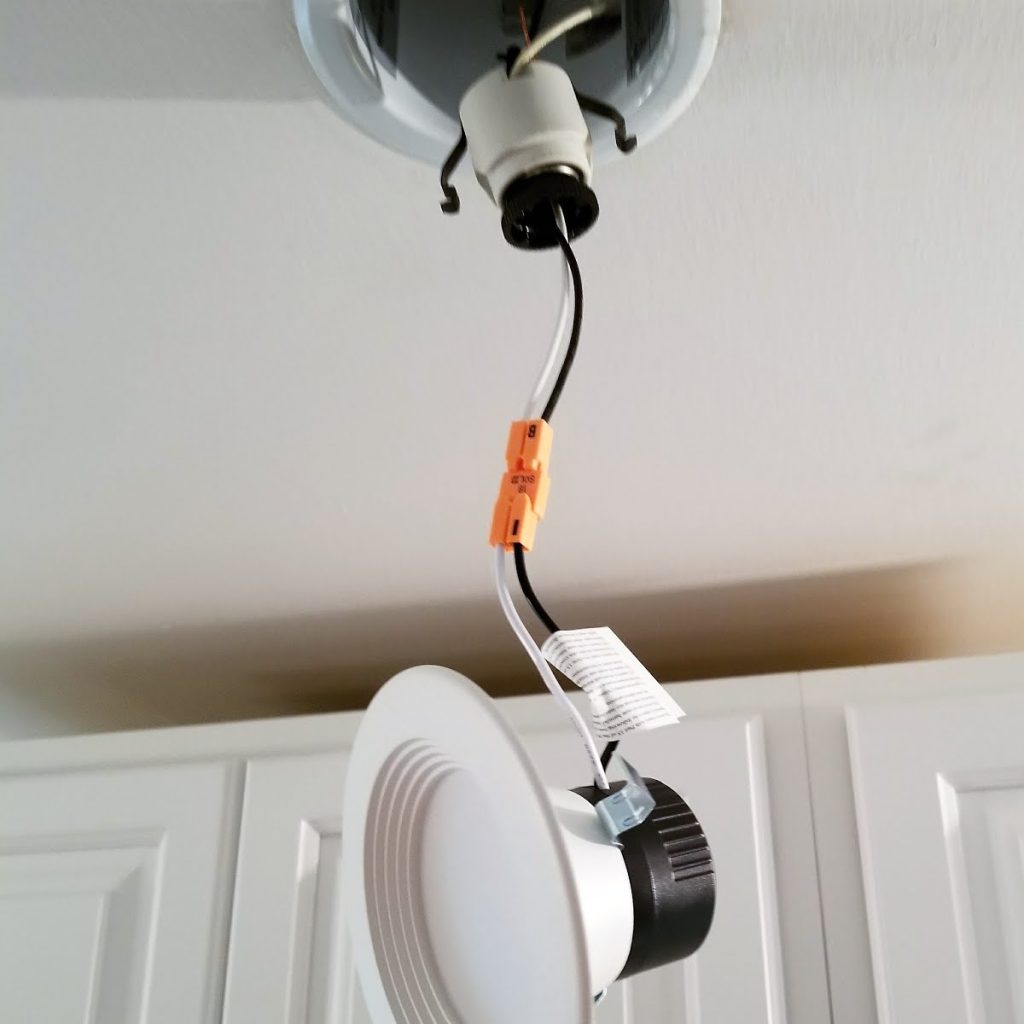
Connecting the Wires
Once the wire reaches each fixture, strip the ends using a wire stripper. Connect the black wire (hot) to the black wire from the fixture and the white wire (neutral) to the white wire. If installing a dimmer switch, connect it in the appropriate sequence as outlined in the product instructions.
To secure the connections, twist the wires together and use wire nuts. Finally, ensure that all connections are properly insulated. Proper wiring is crucial for safety and function, so double-check your connections before proceeding.
Installing the Fixtures
Attaching the Canister
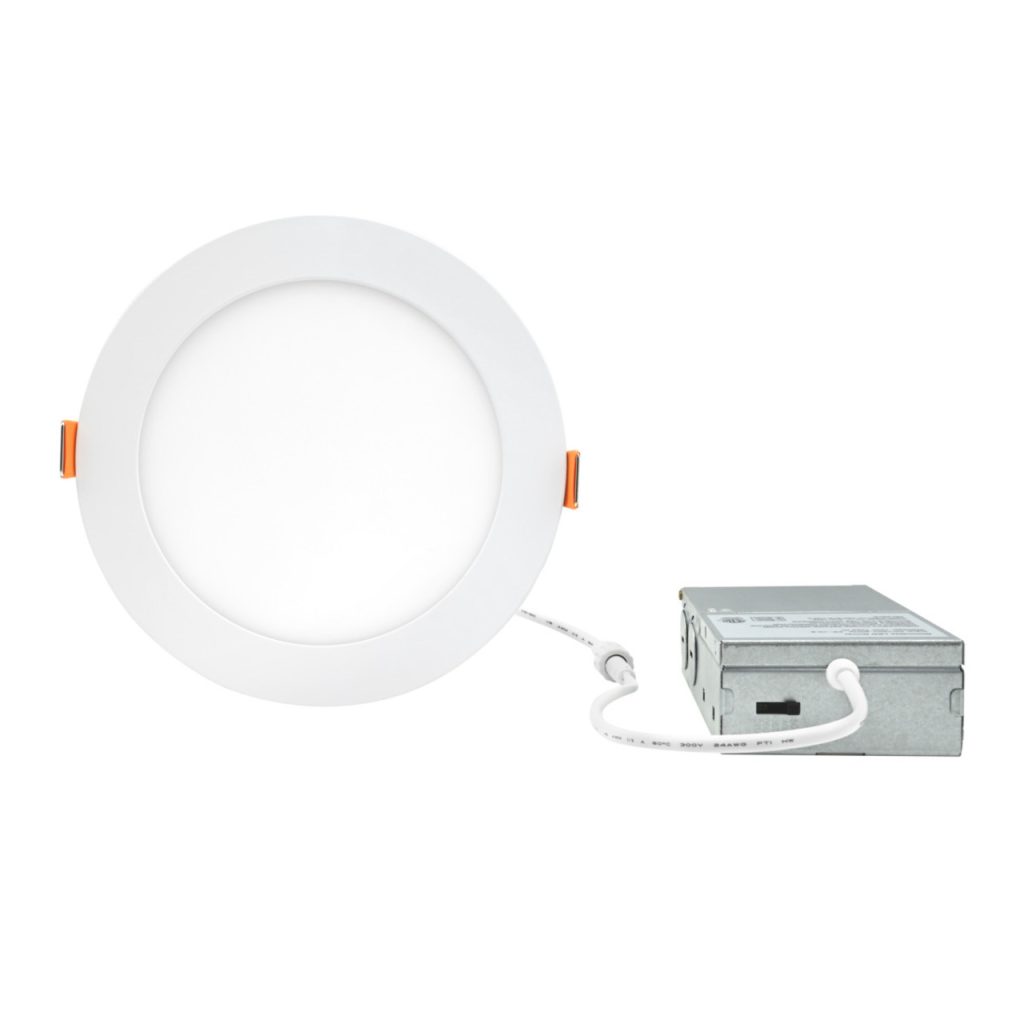
Now that the wiring is complete, it’s time to install the LED recessed light fixtures. Start by placing the canister into the hole. Most recessed lights are designed to be held in place by clips or springs that secure them to the ceiling.
Check the manufacturer’s instructions for specific details on attaching the fixture. Make sure the canister sits flush with the ceiling to achieve a professional look. If necessary, adjust the clips to ensure a tight fit.
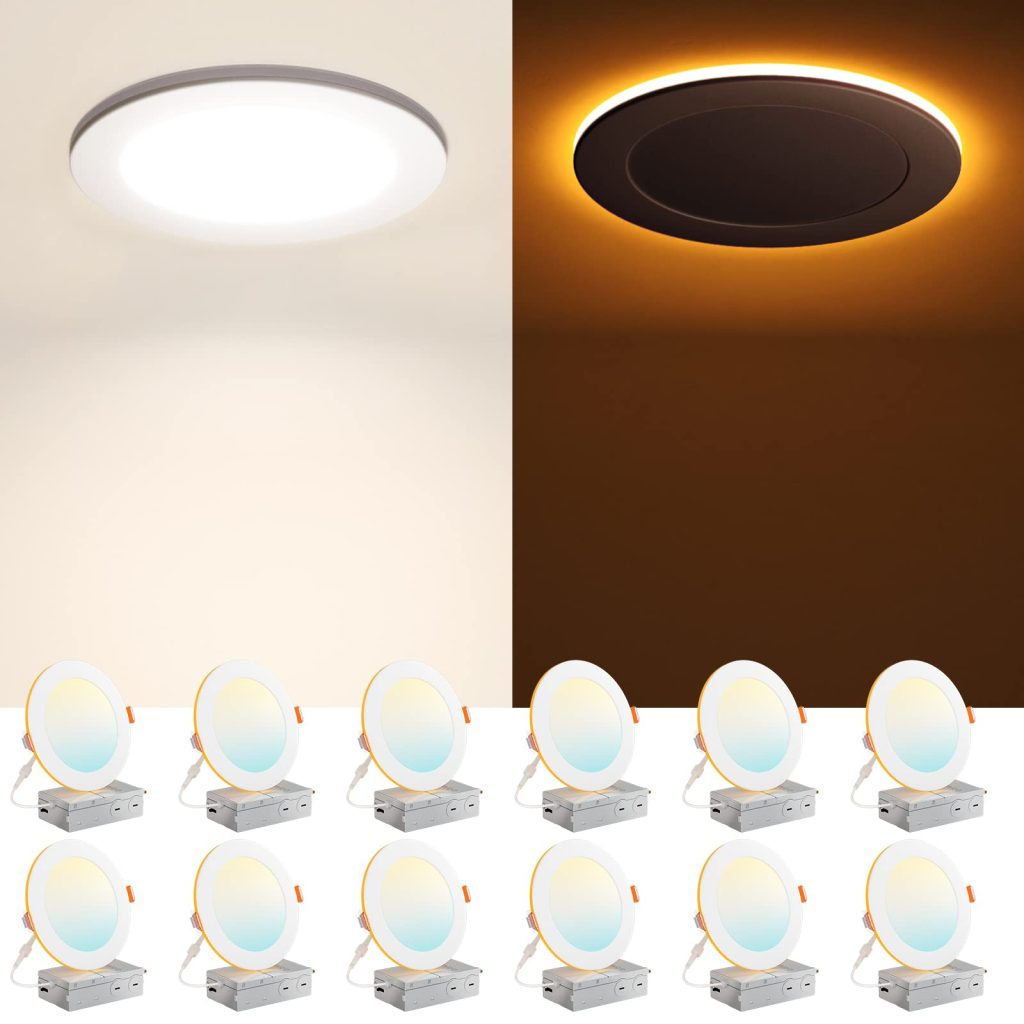
Installing the Bulb and Trim
Once the canister is secure, insert the LED bulb into the fixture. Depending on the type of recessed light, you may need to attach a trim piece to complete the installation. The trim adds a finished look and can range from simple to decorative styles.
Follow the manufacturer’s guidelines for attaching the trim. Make sure everything fits snugly and looks balanced. Taking the time to install the fixtures correctly ensures a polished appearance in your home.
Final Checks and Power On
Inspecting Your Work
Before turning the power back on, inspect all your work. Make sure all fixtures are securely installed and that the wiring is properly connected. Check for any loose wires, ensuring that everything is safe and sound.
If you installed a dimmer switch, verify its connections as well. Safety should always be your main concern. Once you’re confident that everything is in order, you can turn the power back on.
Testing the Installation
After restoring power, turn on the lights to test whether everything works. Check each fixture to confirm that it is functioning properly. If any fixtures do not light up, turn off the power again and double-check the wiring.
If everything works as expected, take a moment to enjoy your newly installed LED recessed lighting. The transformation of your space will be considerably brighter and more inviting. Celebrate your hard work with a well-deserved moment of satisfaction!
Maintenance and Care for Your LED Recessed Lighting
Regular Inspections
Once your LED recessed lights are installed and operational, regular maintenance will help ensure their longevity and efficiency. Periodically check each fixture for any signs of damage or wear, such as flickering lights or unresponsive bulbs. Dust and dirt can accumulate around the trims and bulbs, reducing brightness. To keep your fixtures looking fresh, gently clean them with a soft, dry cloth.
Also, inspect the electrical connections visually, ensuring that all wires and connections are stable and secure. If you notice any issues, it’s better to address them early to avoid costly repairs or safety hazards. A quick inspection every few months can save time and effort down the line.
LED Replacement and Upgrades
One of the advantages of LED lighting is the ease of replacement. While LEDs generally last a long time, they may still need replacing eventually. When it’s time to change a bulb, make sure to use high-quality replacements that match the specifications of your existing fixtures. Always turn off the power before replacing any bulbs to ensure safety.
As technology advances, consider upgrading your recessed lights with smart LED bulbs. These bulbs offer features like remote control, color changing, and scheduling options. Installing smart bulbs can enhance the overall experience and connectivity of your lighting system, allowing for customizable settings to match your mood and activities. Keeping your lighting updated helps create a more versatile living environment tailored to your needs.
Conclusion: Enjoying Your New Lighting
Installing LED recessed lighting in your existing ceiling can dramatically improve the ambiance and functionality of any room. With careful planning, attention to safety, and methodical execution, you can achieve professional-looking results.
Remember to prioritize safety at every step and to take your time with planning and installation. Enjoy the benefits of your new lighting, such as energy efficiency and a modern aesthetic. With these skills, you can tackle future lighting projects with confidence and creativity!