Contents
- 1 Step-by-Step Guide to Installation
- 1.1 Measuring Your Space
- 1.2 Selecting the Right LED Strips
- 1.3 Choosing Power Supplies and Dimmers
- 1.4 Tools and Materials Preparation
- 1.5 Cutting and Soldering LED Strips
- 1.6 Drilling Holes for Wires
- 1.7 Running and Connecting Wires
- 1.8 Securing LED Strips Under the Cabinets
- 1.9 Hiding Wires and Final Touches
- 1.10 Testing the Newly Installed Lighting
- 2 Additional Tips for a Professional Finish
- 3 The Advantages of LED Lighting in Kitchens
- 4 Common Pitfalls and How to Avoid Them
- 5 Maintaining Your LED Under Cabinet Lighting
- 6 Incorporating Smart Lighting Controls
- 7 Expert Advice and Resources
Step-by-Step Guide to Installation
How to install under cabinet led lighting! Embarking on your under cabinet LED lighting project involves a structured process from planning to execution. Here’s a clear, step-by-step pathway to elevate your kitchen with the brilliance of LEDs.

Measuring Your Space
Start by capturing accurate lengths and depths beneath your cabinets. Use a reliable measuring tape, making note of electrical outlets and possible obstructions. Precise measurements pave the way for a seamless installation.
Selecting the Right LED Strips
Opt for LED strips that offer a balance between brightness and hue for your kitchen. Illuminate workspaces well without overwhelming the eyes. Assess strip quality, adhesive strength, and compatibility with dimmers.
Choosing Power Supplies and Dimmers
Choose power supplies that match your LED strips’ voltage and power requirements. Add dimmers for adjustable brightness, enhancing functionality and atmosphere in your kitchen.
Tools and Materials Preparation
Gather your tools: a drill, soldering iron, wire cutters, tape measure, and scissors. Also include materials like solder, electrical tape, and mounting clips for a prepared start.
Cutting and Soldering LED Strips
Trim LED strips at marked intervals to fit your space. Solder connections carefully for enduring functionality. Ensure wires are appropriately stripped and soldered to prevent loose connections.
Drilling Holes for Wires
Decide on discrete wire passage points. Drill holes near the front of the cabinet for minimal visibility, ensuring your wires cross cabinet sections inconspicuously.
Running and Connecting Wires
Feed wires through your drilled holes, connecting strip sections. Use color-coordinated wires for clarity. Ensure a tidy, organized run of cables for optimal results.
Securing LED Strips Under the Cabinets
Firmly fix LED strips using their adhesive backing or extra mounting tape. Place them toward the cabinet’s front for task lighting, or further back for ambient glow.
Hiding Wires and Final Touches
Tuck away visible wires using clips or adhesive channels for a neat finish. Concealing wires contributes greatly to a professional, clean look of your installation.
Testing the Newly Installed Lighting
Before calling it a job well done, activate your lights. Check for even illumination, dimming functionality, and any dark spots. Ensure a visually pleasing, functional lighting setup before finalizing.

Additional Tips for a Professional Finish
To achieve that high-end look after installing under cabinet LED lighting, consider these extra tips.
Choosing Between Different Types of LED Strips
There are a variety of LED strips available, each serving different purposes. For intense brightness, go for high-lumen output strips. For softer lighting, consider ones with lower lumens. Also, look at the strips’ ability to cut and connect to fit your space.
Understanding Color Temperatures
The color temperature of your LEDs impacts the mood of your kitchen. Warmer hues (2700K-3000K) create a cozy atmosphere. Cooler hues (3500K-6500K) offer a more energizing environment. Choose based on the feel you want for your kitchen.
Why Angled Profiles May Be Beneficial
Angled profiles direct light towards your workspaces, preventing glare on glossy countertops. They also add depth to lighting and can enhance the overall aesthetic of your kitchen.
Planning for Power Sources and Outlets
Before installation, ensure you have access to power sources and plan for outlet locations. If possible, hide power supplies and wires inside or behind cabinets to maintain a clean look.
The Advantages of LED Lighting in Kitchens
LED lighting has become a game-changer in kitchen design, combining form and function in a way that other lighting options can’t match. Let’s explore the top benefits of installing LED lighting under your kitchen cabinets and how it can revolutionize your space.
Energy Efficiency and Cost-Effectiveness
LED lights are power savers. They use less electricity compared to traditional bulbs, which leads to lower utility bills. Their long life span also means fewer replacements, saving you money over time. Investing in LED lighting for your kitchen is a smart, cost-effective choice for the savvy homeowner.
Enhancing Kitchen Aesthetics with LED Lights
These lights can drastically improve the look of your kitchen. They give a clean, modern touch and can be customized to match any decor style. Whether you want a bright workspace or a warm glow, LEDs have the versatility to set the right mood in your kitchen.

Improving Kitchen Functionality
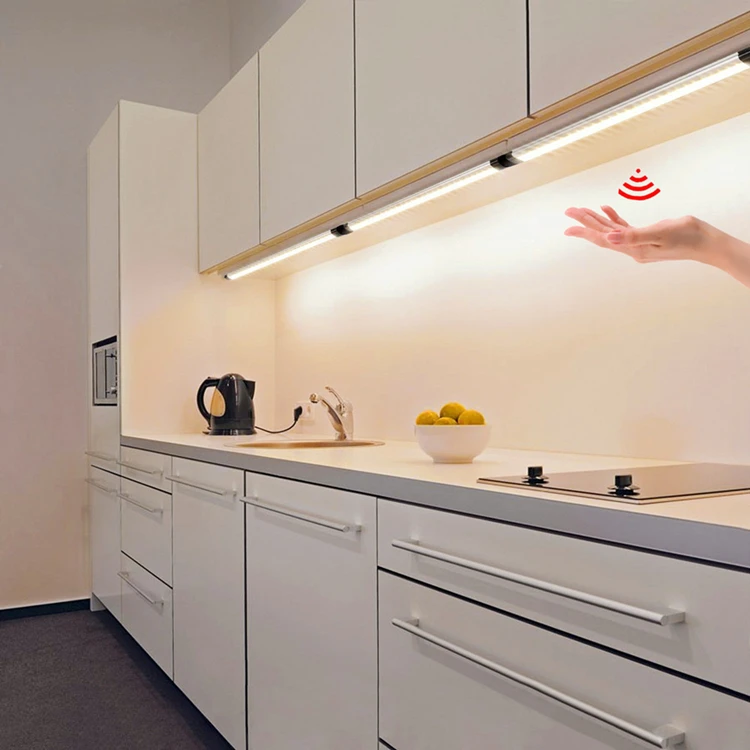
LEDs go beyond looks; they boost functionality too. Placing LED strips under your cabinets lights up countertops, making it easier to prepare food and clean up. They bring shadowed areas to light, ensuring you can focus on the task at hand without strain.
Common Pitfalls and How to Avoid Them
Successfully installing under cabinet LED lighting not only enhances your kitchen’s aesthetic and functionality but also avoids the pitfalls that can arise. Here’s how you can sidestep common mistakes and ensure a smooth installation process.
Avoiding Incorrect Measurements
To prevent miscalculations, measure each section of your cabinetry precisely. Double-check measurements before cutting any LED strips. Accurate dimensions ensure the perfect fit and function of your lighting system.
Preventing Poor Soldering Connections
Soldering requires care. Ensure each connection is clean and well-soldered to prevent future issues. If you’re not confident in your soldering skills, consider using reliable connectors as an alternative.
Selecting the Appropriate Adhesive and Mounting Equipment
For a firm hold, choose high-quality adhesive tape or mounting clips. This ensures your LED strips stay in place under cabinets. Avoid using low-quality tapes that may fail over time, leading to loose or drooping lights.
Maintaining Your LED Under Cabinet Lighting
Proper maintenance ensures your LED lighting performs well over time. Here’s how you can keep them in top condition.
Cleaning and Care for Longevity
To maintain your LED under cabinet lights:
- Turn off the power before cleaning.
- Gently dust off with a soft cloth regularly.
- Use a mild detergent for greasy spots; avoid harsh chemicals.
- Ensure lights are dry before turning back on.
Simple upkeep like this keeps your LEDs shining brightly and extends their lifespan.
When to Consider Replacing LED Strips
You may need to replace your LED strips if you notice:
- Dimming lights not fixed by changing the power source.
- Flickering that persists after checking connections.
- Color changes or lights not turning on.
It’s time for new strips when performance drops and fixes don’t work.
Incorporating Smart Lighting Controls
Transforming your kitchen’s ambiance and usability can be achieved through the inclusion of smart lighting controls for your under cabinet LED lighting setup. Not only do these tools streamline light management, but they also integrate seamlessly with modern smart home systems for a truly connected home environment.
Syncing LED Lights with Your Smart Home System
Embrace the convenience of controlling your under cabinet LED lighting with the existing smart home ecosystem. Syncing your lights can be straightforward and immensely satisfying, allowing you to adjust brightness, set schedules, and even change light colors, depending on your system’s capabilities, all through a simple app on your phone or a voice-activated assistant.
- Choose Compatible LED Lights: Opt for LED strips that are compatible with smart home platforms like Amazon Alexa, Google Assistant, or Apple HomeKit.
- Install a Smart Controller: A smart controller acts as the bridge between your LED lights and the smart home system.
- Download the Relevant App: Each smart home system typically has its own app, which you’ll need to control the lighting.
- Follow Set-Up Instructions: Connect your smart controller to the app and sync it with your home network.
- Enjoy Voice and App Control: Once synced, your LED lights can be adjusted with voice commands or a few taps on your smartphone.
Using Remote and Touchpad Options for Convenience
You might prefer a physical remote or touchpad for control, which comes in handy when you don’t have your smartphone nearby or simply prefer a tactile option. These devices offer a direct way to adjust lighting without the need for smart devices.
- Remote Control: Provides the flexibility to adjust lighting from anywhere in the room, often including dimming and on/off capabilities.
- Touchpad Controllers: Offer a fixed, wall-mounted solution that can include features like dimming, color-changing, and even programmable scenes.
Remember, the key is to choose controls that complement your lifestyle and enhance the convenience factor of your under cabinet LED lighting system. With smart controls, your kitchen lighting is not just functional but also a testament to modern living.
Expert Advice and Resources
Navigating the installation of under cabinet LED lighting can be smooth with the right guidance. For those embarking on this task, expert advice and a wealth of resources are available to ensure a successful outcome. Here’s how you can access detailed tutorials and find help for any challenges you may encounter.
Accessing Detailed Tutorials and Visual Guides
Look for comprehensive tutorials that cover every aspect of LED installation. Websites of LED product manufacturers often have step-by-step guides. YouTube channels dedicated to home improvement also provide visual walkthroughs that can be particularly helpful. These resources will show you the exact techniques for measuring, cutting, mounting, and connecting your LED strips. Furthermore, they can offer insights into the best practices for achieving a sleek, professional look.
Where to Seek Help for Installation Challenges
Should you face any hurdles, help is readily available. Start by consulting the customer support of the company from which you purchased your LED lighting. They have the expertise to troubleshoot common issues. For DIY forums and communities, they are excellent places to ask for advice from fellow home improvement enthusiasts. In case of complex electrical challenges, it’s advisable to reach out to a licensed electrician to ensure safe and proper installation.


