
Contents
- 1 Understanding LED Recessed Lighting
- 2 Benefits of Using LED Lights
- 3 Tools and Materials Needed for Installation
- 4 Safety Measures Before Installation
- 5 Step-by-Step Installation Process
- 6 Tips for Positioning Your LED Recessed Lights
- 7 Finishing and Testing Your Installation
- 8 Troubleshooting Common Installation Issues
Understanding LED Recessed Lighting
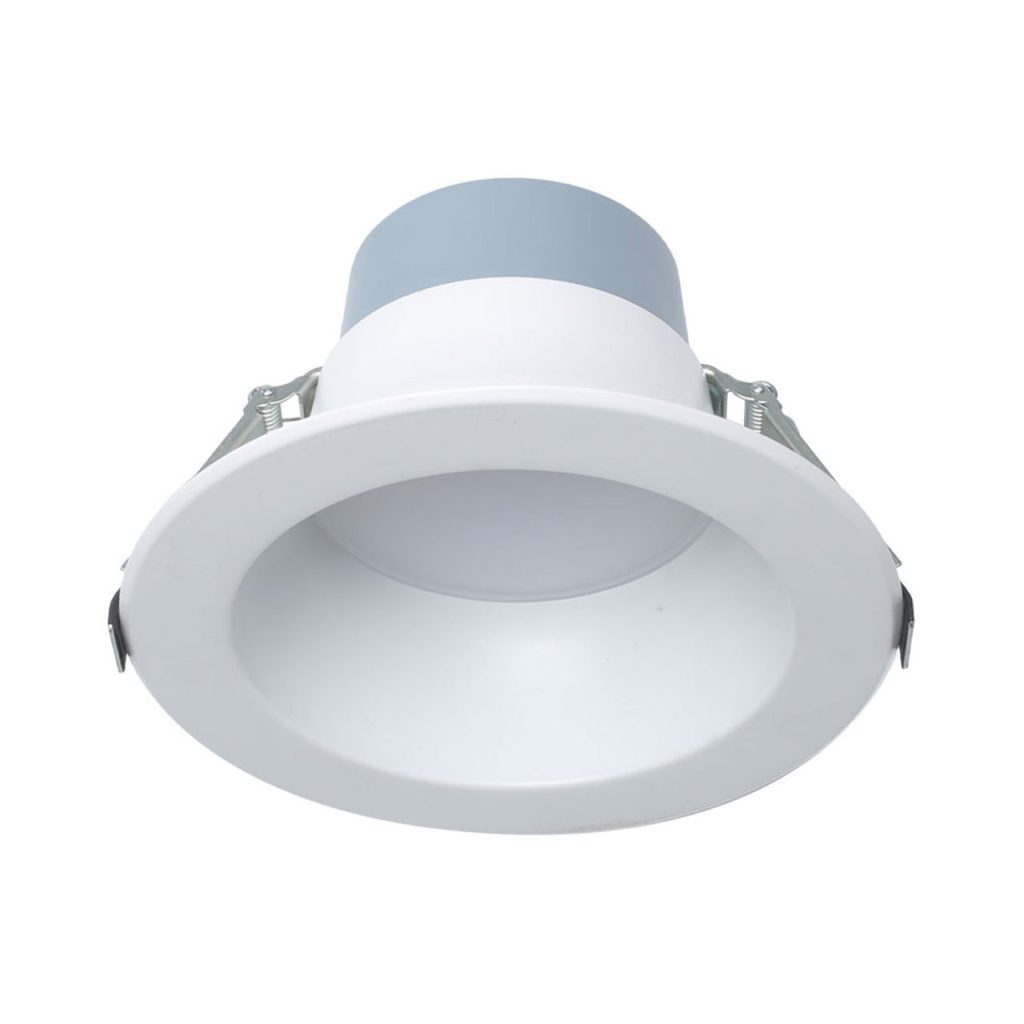
LED recessed lighting, often known as downlights or can lights, are fixtures installed into the ceiling. Unlike traditional lighting, they do not protrude. This makes them sleek and modern. When you install LED recessed lighting without a can, you connect the lights directly to the ceiling. This method reduces space needed above the ceiling. It also simplifies installation.
LED stands for Light Emitting Diode. This technology uses a semiconductor to convert electricity into light. LED lights are energy efficient. They also have a longer lifespan compared to incandescent or halogen bulbs. Choosing to install LED recessed lighting without can allows for great flexibility in design. You don’t need traditional housing. So, you can place lights in areas with limited space above the ceiling.
Before starting your project, understand the types of LED recessed lights. There are retrofit modules and integrated LED fixtures. ‘Retrofit’ modules are designed to fit into existing housings. They are not suitable for installation without a can. ‘Integrated’ LED fixtures come with a built-in light source. They are the right choice for this installation method.
Remember to select fixtures rated for contact with insulation (IC-rated) if necessary. Also, look for fixtures compatible with your dimming system. Some lights are dimmable, while others are not. This choice will affect your lighting’s adaptability and your room’s ambiance.
Once you have a basic understanding, you can proceed with gathering tools and getting ready for installation. It is important to arm yourself with the right knowledge. Proper installation ensures safety and functionality. The next sections will guide you through preparation and the actual installation process.

Benefits of Using LED Lights
Choosing LED recessed lighting offers several benefits. These advantages make LEDs a preferred choice over traditional lighting sources.
Energy Efficiency: LED lights use less power than traditional bulbs. This results in lower electricity bills. You can save significant costs over the light’s lifespan.
Longevity: LEDs have a long life. They last much longer than incandescent or halogen bulbs. This reduces the need for frequent replacements.
Less Heat Production: LED lights generate less heat. This makes them safer to use. It also reduces cooling costs in your home.
High-Quality Light Output: LEDs provide bright and high-quality light. They offer better color accuracy and distribution.
Environmentally Friendly: LED lights are eco-friendly. They do not contain mercury like some fluorescent lights. Their long life also means less waste.
Low Maintenance: With no bulbs to change, LED recessed lighting is low maintenance. This saves time and effort in the long run.
Instant On: Unlike some energy-saving bulbs, LEDs light up instantly. There is no waiting time for them to reach full brightness.
Versatility: LEDs come in various colors and designs. You can choose options that fit your room’s style and mood.
Dimmable Options: Many LED lights are dimmable. This gives you control over the lighting intensity.
When you install led recessed lighting without can, these benefits enhance your space. They provide both functional and aesthetic advantages. Along with cost savings, LEDs offer a modern approach to lighting that fits various settings.
Tools and Materials Needed for Installation
To successfully install LED recessed lighting without a can, you need the right tools and materials. This will ensure a smooth and efficient installation process. Here is what you will need:
- LED Recessed Lights: Choose integrated LED fixtures that do not require traditional housing.
- Drill: For making holes in the ceiling where the lights will fit.
- Hole Saw Attachment: Attach this to your drill to cut precise openings for the lights.
- Screwdriver: Necessary for securing the fixtures in place.
- Wire Cutters and Stripper: To cut and prepare electrical wires.
- Wire Nuts: For making wire connections.
- Electrical Tape: To safely insulate wire connections.
- Voltage Tester: To ensure safety by checking for live wires.
- Marker: To mark the positions on the ceiling where you will install the lights.
- Ladder: To reach the ceiling safely.
- Safety Glasses: To protect your eyes from debris.
- Dust Mask: To avoid inhaling dust.
Make sure you have all these tools and materials ready before starting. Double-check their condition to prevent any mishaps. Be familiar with how to use each tool. If needed, seek help or additional instructions. With everything prepared, you will be set to move on to the safety measures and installation process.
Safety Measures Before Installation
Before you start to install LED recessed lighting without a can, safety must be your priority. Here are crucial safety measures to follow:
- Turn Off Power: Always switch off the main power at the circuit breaker. This prevents electric shock.
- Use a Voltage Tester: After turning off the power, use a voltage tester. Make sure no wires are live.
- Wear Safety Gear: Put on safety glasses and a dust mask. This protects your eyes and lungs.
- Secure the Ladder: Ensure your ladder is stable. It should not wobble or tilt while you work.
- Check the Ceiling Area: Look for any obstacles like pipes or wires. You must avoid these during installation.
- Have a First Aid Kit: Keep a first aid kit nearby in case of minor injuries.
- Work with a Partner: If possible, have someone help you. They can hand you tools and hold the ladder.
- Clear the Space: Remove furniture and cover the floor. This protects your belongings and makes cleanup easier.
- Familiarize with Local Codes: Know your local building and electrical codes. Follow them to ensure a compliant installation.
Following these safety measures will help prevent accidents. They will also set the stage for a successful installation of your LED recessed lighting.
Step-by-Step Installation Process
After completing your safety checks and pre-installation preparation, it’s time to begin the actual installation of your LED recessed lighting. These step-by-step instructions will guide you through the process, ensuring a smooth and safe experience.
- Mark the Ceiling: Use your marker to trace the outline where each light will go. Make sure these are evenly spaced and align with your design plan.
- Cut the Holes: Fit the hole saw attachment to your drill. Cut out the marked areas on the ceiling. Do this carefully to fit the lights snugly.
- Check for Obstacles: Before installing, look for any hidden pipes or wires. It’s crucial to avoid these during the process.
- Run the Wiring: Guide the electrical wiring to each hole. Follow the correct code for wiring in your area. Make sure to use wire nuts to connect wires securely.
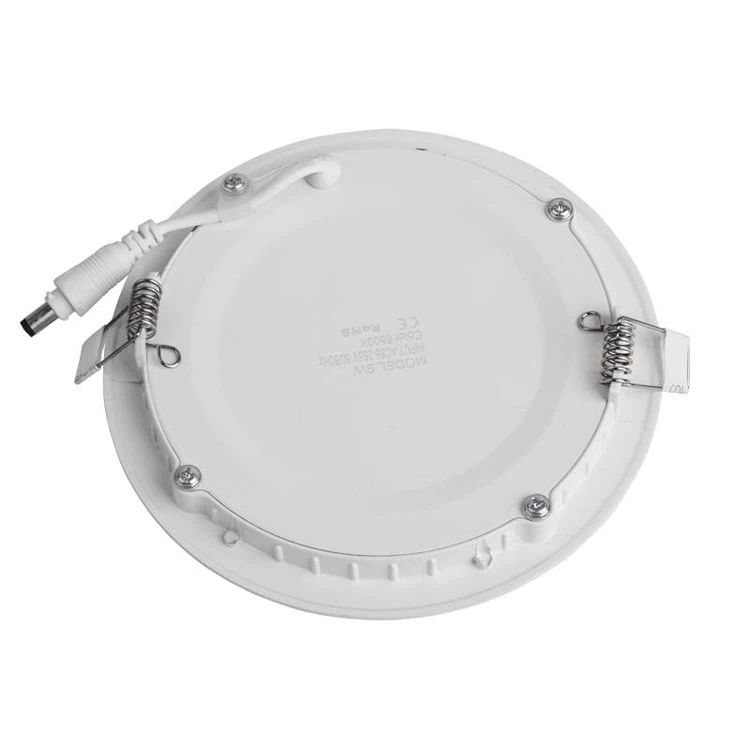
- Install the Fixtures: Now, take each LED recessed light and tuck the driver up into the ceiling. Then, secure the fixture according to the manufacturer’s instructions. This might involve clips or screws.
- Connect the Lights: Attach the lights to the wiring. Use wire nuts to connect wires correctly. Insulate them with electrical tape for safety.
- Test the Connections: Before you move on, use the voltage tester. Check each connection to make sure it’s safe and not live.
- Switch on the Power: Go back to your circuit breaker and turn the power back on. Now it’s time to test if the lights work.
- Adjust as Needed: If the lights do not function correctly, switch the power back off. Then, recheck your connections and wiring. Do not proceed until everything is working as it should.
By following these steps closely, you’ll be able to install LED recessed lighting without a can safely and effectively. Remember to have all your tools and materials at hand. Be patient and precise throughout the process.
Tips for Positioning Your LED Recessed Lights
To achieve the best lighting results, good positioning of your LED recessed lights is crucial. Here are some tips:
- Consider Room Layout: Think about furniture and how the room is used. Place lights to enhance the space.
- Uniform Spacing: Distribute lights evenly for consistent illumination. Avoid dark spots in the room.
- Avoid Shadows: Place lights away from the edge of the ceiling and walls. This reduces shadows cast by fixtures.
- Use a Template: A cardboard template can help visualize light placement before drilling.
- Task Areas: Focus extra light where you perform tasks. In kitchens, this may be over counters and sinks.
- Ambiance: For living areas, create mood with softer light placement. Think about dimmers too.
- Highlight Features: Use lighting to draw attention to paintings or architectural details.
- Avoid Glare: Direct lights away from screens and mirrors. This reduces glare and reflection.
- Test with Bulbs: Before finalizing, temporarily place bulbs to see actual effects.
Aligning your LED recessed lighting with these tips will optimize room ambiance and functionality.
Finishing and Testing Your Installation
After installing your LED recessed lights, finishing touches are crucial for a clean look. Testing ensures everything works properly. Follow the steps below to finish and test your installation.
- Check Fixture Security: Confirm that each light fixture is secure. Firmly fasten it to the ceiling without movement.
- Inspect Wiring: Re-examine all electrical connections. Make sure they are tight and well insulated with electrical tape.
- Replace Ceiling Material: If you had to remove any ceiling parts, now is the time to put them back. Make it look as it was before the installation.
- Clean Up: Remove all tools and debris from the work area. A clean space helps in spotting any missing steps.
- Test Light Functionality: With the main power on, switch on the lights. See if they all work as expected.
- Adjust Light Direction: Some LED lights allow adjustment. Direct them to the desired areas for optimal lighting.
- Test Dimmer Compatibility: If you installed dimmable lights, check the dimming function. Make sure it operates smoothly without flickering.
- Final Inspection: Take a step back. Look at the lighting effect in the room. Make sure it meets your expectations and needs.
By following these steps, you’ll ensure your LED recessed lighting is not only safely installed, but also functional and aesthetically pleasing. Remember to switch off the power before making any adjustments during the testing phase. Once you’re satisfied with the installation, you can enjoy the enhanced lighting in your space.
Troubleshooting Common Installation Issues
When you install LED recessed lighting without a can, you may encounter some common issues. Here’s how to troubleshoot them:
- Light Doesn’t Turn On: Check if the power is on. Ensure all wire connections are secure and taped.
- Flickering Lights: This could be a sign of loose wiring. Tighten all connections and check the dimmer compatibility.
- Uneven Lighting: Adjust the positioning of the lights. Make sure they’re spaced evenly across the ceiling.
- Dim Lights: Ensure the LED driver is properly connected. Check if the dimmer is appropriate for the lights.
- Lights Turn Off: This may happen if the fixtures overheat. Confirm that your lights are compatible with insulation and aren’t covered by it.
- Cannot Dim Lights: Not all LED lights are dimmable. Verify that you have dimmable LEDs and a compatible dimmer switch.
If you’ve tried these steps and the problem persists, consult the product manual or reach out to a professional. They can help ensure safe and correct installation of your LED recessed lighting.

