
Wiring a light switch is a practical skill that can be both empowering and cost-effective. It may seem intimidating at first, but with a step-by-step guide and the right precautions, anyone can safely install or replace a light switch. This article will how to wire a light switch and provide a detailed guide to wiring a light switch, covering everything from preparation to the final safety checks.
Contents
Preparation and Safety Precautions
Gather Necessary Tools and Materials
How to wire a light switch? Before starting any electrical work, gather all necessary tools and materials. For wiring a light switch, you will need a screwdriver, wire strippers, needle-nose pliers, electrical tape, wire nuts, a voltage tester, and the light switch itself. You might also need a flashlight if you are working in an area without natural light or existing lighting. Having all these tools on hand will make the process smoother and quicker and reduce the risk of mistakes.
Additionally, it might be helpful to have a circuit tester to ensure the existing wires are live or dead when you need them to be. This can prevent unwanted surprises when you start working. A faceplate for the switch, which you will install once the switch is connected, completes your list of materials.
Turn Off Power and Test Wires
The single most important step in any electrical work is ensuring your safety by turning off the electrical power supply. Locate your home’s main electrical panel, usually found in a basement or garage, and switch off the circuit breaker that supplies power to the light switch you are working on. Label the breaker to inform others in the household that you are working on that circuit.
Use a voltage tester to double-check that the power is off. Touch the tester to the wires on the light switch to confirm there is no electrical current. This cannot be overemphasized—as electrical work carries the risk of shock or fire if done improperly. Once you’re sure the power is off, you’re ready to begin the actual wiring process.

Removing the Old Switch
Unscrew and Remove the Faceplate
Use a screwdriver to remove the screws holding the faceplate of the current light switch in place. Set these screws aside, as you will need them later to attach the faceplate of the new switch. Once the faceplate is removed, set it aside as well; it can be reused or replaced with a new one if necessary.
With the faceplate off, you will have a clear view of the switch and the wiring. Make sure the area is well-lit. If necessary, use a flashlight to illuminate your work area, especially if you had to turn off all power to the room.
Disconnecting the Old Switch
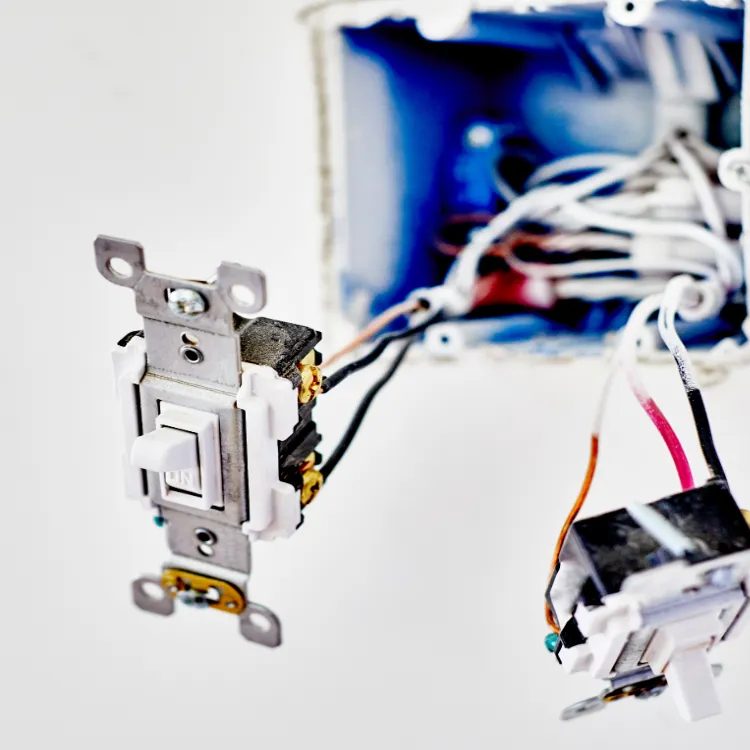
Carefully unscrew the mounting screws holding the switch to the electrical box. Once these screws are out, gently pull the switch out of the box, allowing access to the wires attached to it. Take note of how the wires are connected to the switch, or better yet, take a picture for reference. This can be quite helpful if you need to compare it later.
Using a screwdriver or needle-nose pliers, loosen the terminal screws that secure the wires to the old switch and gently disconnect them. These wires will need to be reconnected to the new switch. Double-check that the wires are not frayed or damaged. If they are, use the wire strippers to cut back the wire and strip off about half an inch of insulation to expose fresh copper wire.
Installing the New Switch
Connecting the Wires to the New Switch
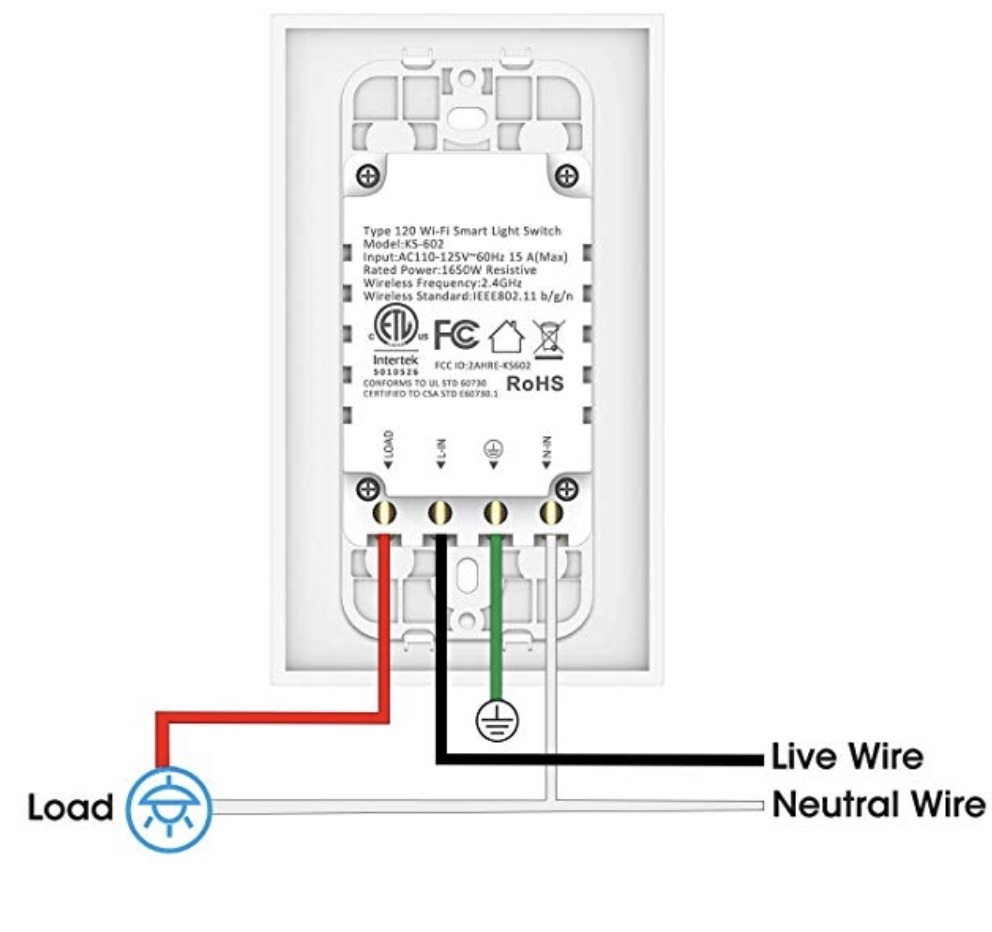
To install the new switch, start by connecting the wires. Typically, you will see two or three wires: a black (hot) wire, a white (neutral) wire, and a green or bare copper (ground) wire. Depending on your circuit, some switches will only use the hot and ground wires.
First, connect the ground wire to the green screw on the new switch. Use your needle-nose pliers to shape the wire into a loop that fits neatly under the screw. Tighten the screw securely to hold the wire. Next, connect the black hot wire to one of the brass terminal screws on the switch and tighten it. If there is a second black wire, connect it to the second brass terminal.
Securing the Switch in the Electrical Box
Once the wires are securely connected to the new switch, carefully tuck the wires back into the electrical box. Make sure they are not crimped or pinched. Align the switch with the screw holes on the electrical box and use the screws you removed earlier to secure the switch in place. Ensure the switch is level and sits flush against the wall.
After securing the switch, attach the faceplate by aligning it over the switch and securing it with the screws provided. Tighten the screws until the faceplate is snug but avoid over-tightening to prevent cracking the plate.
Final Checks and Testing
Double-Check Connections
Before turning the power back on, double-check all connections. Make sure the wires are securely fastened to the terminal screws and the ground wire is properly connected. Inspect the electrical box to ensure no wires are exposed, and everything is neatly tucked away.
Safety is paramount, so don’t rush this step. Ensuring all connections are secure will prevent issues such as shorts or electrical fires. A final visual inspection helps confirm that everything is in place and ready for testing.
Restore Power and Test
Go back to the main electrical panel and switch the circuit breaker back on. Return to the newly installed light switch and flip it on and off to test its functionality. The light should turn on and off without any issues. If it doesn’t work as expected, turn off the power again and recheck your connections.
Testing the light switch also involves making sure there are no unexpected sparks, noises, or malfunctions when you operate it. If everything works smoothly, you’ve successfully wired your new light switch.
How to Wire a 3-Way Light Switch
Wiring a 3-way light switch can seem complex, but it becomes manageable with a clear understanding and step-by-step approach. In a 3-way switch setup, two switches control one light, allowing for convenient operation from different locations—ideal for stairwells, long hallways, or large rooms. Below, we break down the process into two comprehensive sections: preparation and actual wiring.
Preparation: Tools, Materials, and Safety
Before diving into the wiring process, preparation is key. Gather all necessary tools and materials: three-way switches (you’ll need two), a voltage tester, wire strippers, screwdrivers, needle-nose pliers, electrical tape, wire nuts, and a flashlight if you’re working in a dimly lit area. It’s also wise to have a wiring diagram handy, which will serve as a visual guide throughout the process.
Safety is paramount when working with electricity. Start by turning off the circuit breaker that controls the circuit you’ll be working on to ensure no power is flowing through the wires. Use a voltage tester to double-check that the power is indeed off. Touch the tester to all the wires you’ll be working with to confirm they are not live. Labeling the circuit breaker is a good practice to inform others at home that you are working on that circuit and to prevent accidental power restoration. Once you’ve confirmed that the power is off, you’re ready to proceed with confidence.
Actual Wiring: Step-by-Step Process
Begin by removing the existing switches, if any. Use a screwdriver to remove the faceplates and the mounting screws holding the switches to the electrical box. Gently pull the switches out to expose the wiring. Note the wiring configuration, or better yet, take a picture for future reference. Disconnect the wires by loosening the terminal screws and gently pulling the wires free.
Next, identify the common screw on the new 3-way switches. This screw is typically darker than the others and plays a crucial role in the circuit. You will also notice two brass or silver terminals on each switch. Connect the black (hot) or common wire from the power source to the common terminal of the first switch. Then, connect the traveler wires (usually red and black) to the brass or silver terminals on both switches. Make sure the connections are tight and secure using your needle-nose pliers and screwdrivers.
Conclusion
Wiring a light switch is a manageable DIY task with the right tools, preparation, and safety precautions. By following these detailed steps, you can confidently replace or install a light switch in your home. Always prioritize safety, turn off the power before beginning any electrical work, and double-check all connections before restoring power. This practical skill not only improves your home but also gives you the satisfaction of having tackled electrical work yourself.
